Showing posts with label Eat. Show all posts

Wednesday, December 31, 2014

Smashed Squash Toasts with Cider Vinegar and Ricotta


My baby girl started eating solids a little over a month ago.  First, she started with a rice cereal slurry, then moved on to smushed up avocado, and then sweet potatoes.  For most veggies, I end up steaming them without any seasoning and then puree them smooth in my Magic Bullet.  Plain steamed broccoli may be unappetizing to me, but my 7 month old gobbles it up (usually). 

I was trying to find ways to re-purpose baby food for grown-up meals and came across this squash toast recipe on one of my favorite food blogs, Smitten Kitchen.  The only major adjustment I made was using pre-cut butternut squash rather than buying it whole, to save on time.  While I roasted most of the butternut squash in oil, salt, pepper, and chili flakes for the recipe, I set aside a cup and roasted it plain for my daughter.  She loved the squash, and us adults were equally happy with our squash toasts.  The vinegary caramelized onions balance out the sweetness of the squash and creaminess of the ricotta.  The mint might seem random, but it just works.  These are perfect for a New Year's Eve cocktail party, or even a weeknight meal in as the components can be made ahead of time and keep well.


Smashed squash toasts with ricotta and cider vinegar
Adapted from recipe from here

Ingredients
2 pounds of cubed butternut squash (I bought the pre-cut bag from Trader Joe's for $4.99)
1/2 c of olive oil
1/2 tsp dried chili flakes
2 tsp of sea salt
1 yellow onion, sliced
1/3 c apple cider vinegar
3 tablespoons of maple syrup
1/3 of a round of sourdough bread (I used the Trader Joe's cracked wheat sourdough bread for some extra texture)
1/2 c of ricotta
10 mint leaves

Directions
Heat oven to 450 degrees.  Toss the cubed butternut squash with 3 tablespoons of olive oil, 1 tsp of salt, and the chili flakes.  Roast on a foil lined baking sheet for 15 minutes, and then flip and roast until lightly browned, about 5-10 minutes more.
While the squash is roasting, heat 3 tablespoons of olive oil in a large skillet over medium-high heat.  Add the onions and salt, and cook while intermittently stirring until lightly browned.  Then add the vinegar and maple syrup, cooking for another 15 minutes until the onions are very soft and broken down.  Combine the caramelized onions and the squash, smashing them all together.
Heat a large skillet and 2 tablespoons of oil over medium heat.  Cook the bread in a single layer until golden brown on both sides.  Spread the ricotta on the toasts.  Pile on the squash mixture, sprinkle with coarse salt, and garnish with mint leaves.
 

Friday, November 21, 2014

Pumpkin Mini Cupcakes

I commemorated my baby girl's half birthday with a batch of pumpkin mini cupcakes.  I figured that even though she couldn't have any (we have just barely started solids), they went well together in that they are both mini and sweet!  The original recipe calls them "muffins," but given that I topped them with a tangy cream cheese frosting, that makes it a cupcake!  I'm such a sucker for cream cheese frosting on anything - carrot cake, red velvet cake, etc.  I cut down on the sugar from the original recipes in both the frosting and the cake itself, but they were still sweet enough in my opinion.  They were super moist, and pretty much guilt-free since they're so small.  That is, unless you are me and have five in one sitting!


Pumpkin Mini Cupcakes with Cream Cheese Frosting
Adapted from this recipe
 
Ingredients
1 3/4 c all purpose flower
2/3 c white sugar
1/2 c dark brown sugar
1 tsp baking soda
1/2 tsp salt
2 tsp cinnamon
1/4 tsp ground cloves
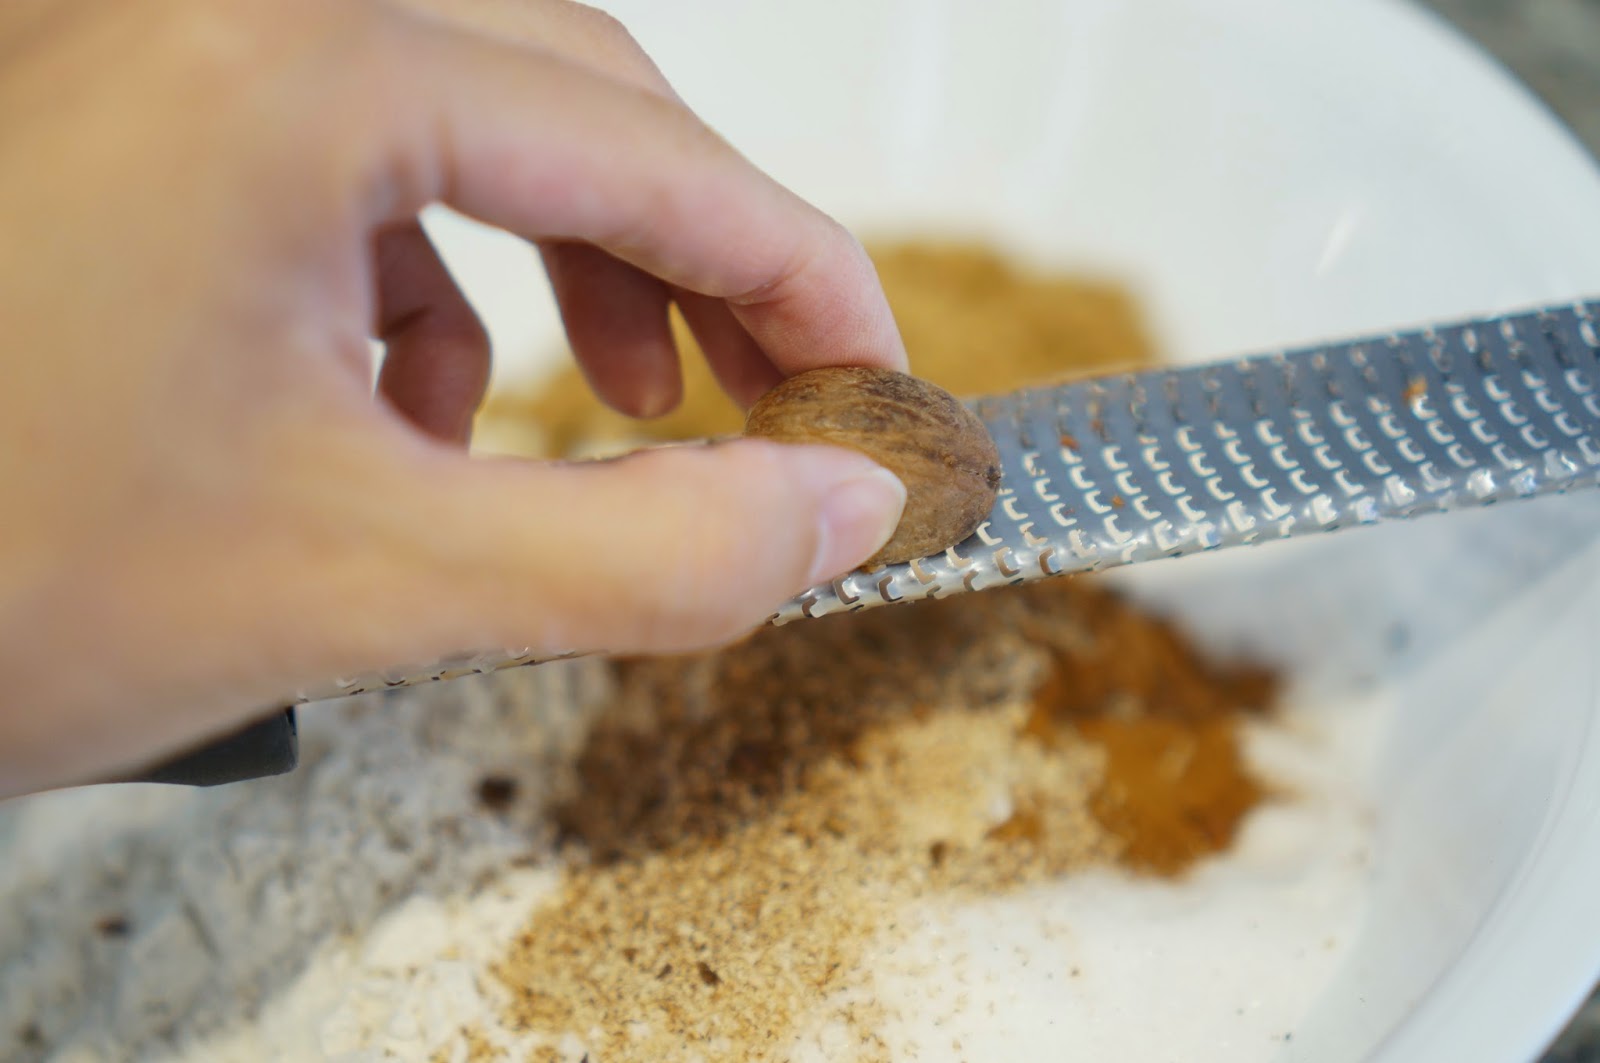
1/4 tsp nutmeg (fresh grated is best!)
2 eggs
1 15 ounce can pure pumpkin puree
1/2 c vegetable oil
1 tsp vanilla extract

Directions
Preheat the oven to 375 degrees.  Whisk together flour, white and brown sugar, baking soda, salt, and spices in a medium bowl and set aside.  In another bowl, whisk together eggs, pumpkin puree, vegetable oil, and vanilla extract.  Combine the wet and dry ingredients and stir until just incorporated.  Be careful not to overmix!  
Place cupcake liners into muffin tins and fill each well until the top of the liner.  Then bake for 13-15 minutes or until a toothpick comes out clean.  For regular-sized cupcakes, you can probably bake for 20-22 minutes.  Wait until they are cooled completely to frost.

Cream Cheese Frosting
Ingredients 
1 8oz brick of cream cheese, at room temperature
1 stick or 1/2 cup of unsalted butter, at room temperature
1 1/3-2 cups of powdered sugar

Directions
Whisk together cream cheese and butter, ideally in a stand mixer.  Then slowly add powdered sugar in parts and mix, tasting along the way to reach the desired sweetness.  I ended up using 1 1/3 cups as I like the tang and don't like my frosting super sweet, but it's up to you!  Once whisked together and there are no clumpy bits of powdered sugar, place into a piping bag or plastic ziploc bag (what I did).  Snip a little hole, and pipe on top of the cooled cupcakes.

Tuesday, July 8, 2014

Peach and Strawberry Crumb Pie


Hello everyone!  It has been over a month since our last post and there's no one to blame but myself.  In my defense, the past month was incredibly busy with Mr. J and I moving into a new home.  Fortunately, we were able to get the majority of our stuff unpacked and organized so we could enjoy the 4th of July weekend.  Our long weekend was just one BBQ after another (no complaints here!).  We hosted the first get together and my friend Vero brought over a delicious peach and raspberry pie from Mission Pie.  With a ton of fresh peaches on hand, I decided to make my own peach pie, swapping out the raspberries for strawberries.  And not to toot my own horn, but this pie was absolutely delicious!  The slightly tart strawberries really complemented the bright peach flavor and the crumb topping paired with a scoop of vanilla ice cream is just drool-worthy.


Peach and Strawberry Crumb Pie

Pie crust recipe here

Ingredients
For the filling:
3-4 large peaches, peeled and cut into 1/2 inch pieces
1/2 pint of fresh strawberries, hulled and sliced in quarters
2 tbsp brown sugar
2 tbsp all-purpose flour

For the crumble topping:
1/3 cup all-purpose flour
1/3 cup brown sugar
1/3 cup old-fashioned rolled oats
6 tbsp cold unsalted butter, cut into small pieces

Directions
In a small bowl, combine the flour, brown sugar, and rolled oats; using your hands, work in the butter until large clumps form.  Cover and refrigerate until ready to use.

In a large bowl, toss together the sliced peaches and strawberries, flour, and brown sugar until combined.  Set aside.

Preheat the oven to 375 degrees F.  Roll out a single pie crust into a 12-inch circle on a floured surface to prevent sticking.  Transfer to a 9-inch pie plate and trim the edges.  Crimp the edges with your thumb and index finger.  Transfer the peach and strawberry filling to the pie shell.  Break the crumble into medium to large size pieces and sprinkle evenly over the top of the pie.  Place pie on the middle rack with a lined baking sheet underneath to catch any juices that spill over.  Bake for 1 hour 15 minutes, until the juices are bubbling and the crumble top is golden.  Cool on wire rack and serve with a generous scoop of vanilla ice cream.


Monday, May 19, 2014

Lemon Cream Tart


I obviously can't get enough of lemons (witness here and here), and here is yet another lemon-based recipe!  Yes, I have an addiction.  

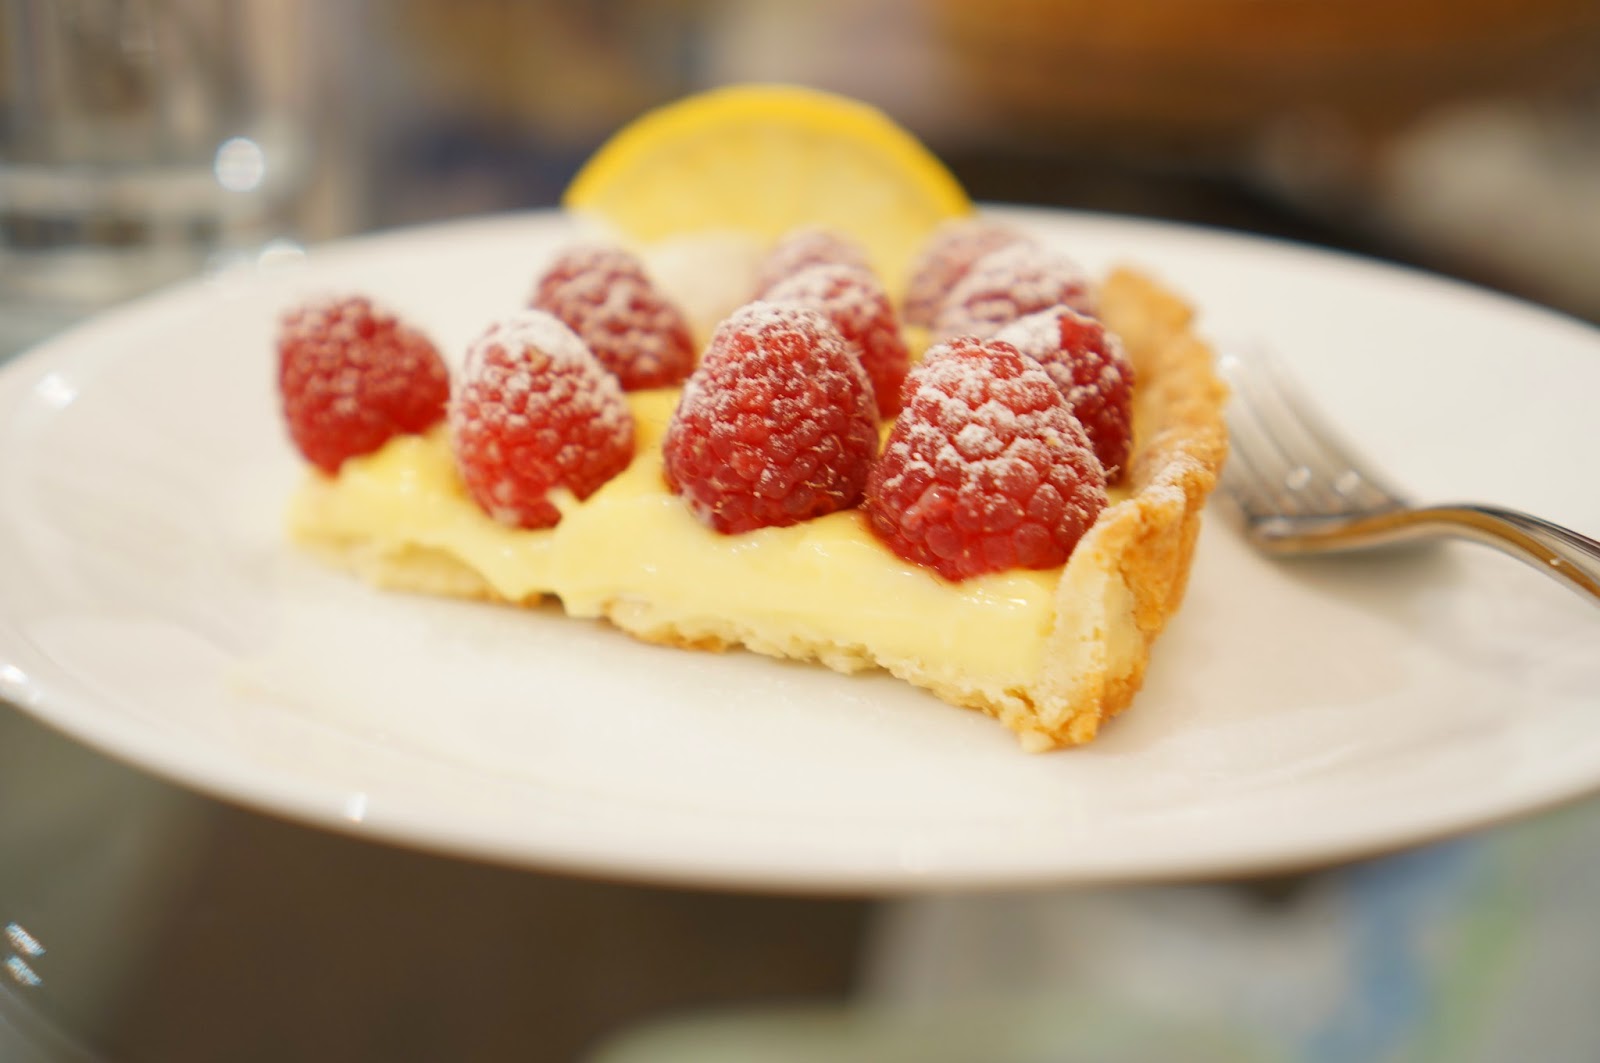
If you've been to San Francisco and haven't been to Tartine Bakery, you are truly missing out.  Yes, there's always a line.  But those buttery almond croissants and morning buns are truly worth the 15, sometimes 45 minute wait.  They also make a stellar lemon cream tart that's also to-die-for.  Here's my version below that I brought to a girls' night get-together.  This time I used a seriously time-saving frozen crust from Trader Joe's and adorned that lemony goodness with fresh raspberries.


Lemon Cream Tart (from Tartine) makes a single 9" tart


Ingredients:

1/2 cup + 2 tablespoons lemon juice
3 large eggs
1 large egg yolk
3/4 cup sugar
Pinch of salt
1 cup (2 sticks) unsalted butter
1 pre-baked tart shell at room temperature


Directions:

Pour water to a depth of about 2 inches into a saucepan, place over medium heat, and bring to a simmer.

Combine the lemon juice, whole eggs, yolk, sugar, and salt in a stainless steel bowl that will rest securely in the pan above the level of water.  Make sure you keep stirring or else you were cook the eggs into hard little pieces!

Place the bowl over the saucepan and whisk until the mixture becomes very thick and registers 180° F on a thermometer, about 10 to 12 minutes.  It should thicken to the point that your whisk leaves a trail through the curd.  Remove the bowl from over the water and let cool to 140° F, stirring from time to time to release the heat.

While the mixture is cooling, cut butter into 1 tablespoon chunks. When the cream is ready, pour it into a countertop blender (or I used a food processor). With the blender running, add the butter 1 tablespoon at a time, blending after each addition until incorporated before adding the next piece. The cream will be pale yellow and opaque.

Pour the cream into your pre-baked tart shell and cover with plastic wrap.  Cool to room temperature and then place in the refrigerator to chill for several hours.  Once cooled, place fresh raspberries over the entire tart, and dust with powdered sugar immediately before serving.


Thursday, May 8, 2014

Pea and Mushroom Risotto


Canned peas have a bit of an icky connotation.  They're mushy and tasteless, often accompanied by also mushy canned carrots and onions in a bland casserole-type dish.  Frozen peas are a significant improvement from the canned variety, as the sweetness is often preserved.  Fresh peas are by far the best, but sadly require extra time for shucking.  Lucikly, Trader Joe's comes to the rescue once again, providing pre-shucked fresh peas, a perfect time saving ingredient.    

I was in the mood for a rich, creamy dish, and this risotto perfectly satisfied my craving.  I even tricked myself into thinking I was being healthy by adding the fresh peas and mushrooms.  Throw in some vegetables and that offsets the butter and cheese, right?


Pea and Mushroom Risotto
Recipe here

Ingredients
8 cups canned low-salt chicken broth
1/2 -ounce dried porcini mushrooms
1/4 cup unsalted butter
2 tablespoons olive oil
2 cups finely chopped onions
10 ounces white mushrooms, finely chopped
2 garlic cloves, minced
1 1/2 cups Arborio rice or short-grain white rice
2/3 cup dry white wine
3/4 cup frozen peas, thawed
2/3 cup grated Parmesan
Salt and freshly ground black pepper, optional
Directions
Bring the broth to a simmer in a heavy medium saucepan. Add the porcini mushrooms. Set aside until the mushrooms are tender, about 5 minutes. Keep the broth warm over very low heat.

Melt the butter in a heavy large saucepan over medium heat. Add olive oil. Add the onions and saute until tender, about 8 minutes. Add the white mushrooms and garlic. Using a slotted spoon, transfer the porcini mushrooms to a cutting board. Finely chop the mushrooms and add to the saucepan. Saute until the mushrooms are tender and the juices evaporate, about 5 minutes. Stir in the rice and let it toast for a few minutes. Add the wine; cook until the liquid is absorbed, stirring often, about 2 minutes. Add 1 cup of hot broth; simmer over medium-low heat until the liquid is absorbed, stirring often, about 3 minutes. Continue to cook until the rice is just tender and the mixture is creamy, adding more broth by cupfuls and stirring often, about 28 minutes (the rice will absorb 6 to 8 cups of broth). Stir in the peas. Mix in the Parmesan. Season with salt and pepper, to taste.


Sunday, April 13, 2014

Lemon Ricotta Cookies


I have always been obsessed with lemons.  When the dessert menu gets passed out at restaurants, I typically glaze over the chocolate offerings and am instantly eyeing the lemon based desserts.  These lemon ricotta cookies (recipe from Giada De Laurentiis) perfectly satisfy my desire for lemony goodness.  Without the glaze, they're a bit eh.  But add the lemon zest glaze on top, and these soft, cake-like cookies are instantly elevated to their full lemon glory. 


Lemon Ricotta Cookies
(recipe from here) 

Ingredients: 
Cookies:
2 1/2 cups all-purpose flour
1 teaspoon baking powder
1 teaspoon salt
1 stick unsalted butter, softened
2 cups sugar
2 eggs
1 (15-ounce) container whole milk ricotta cheese
3 tablespoons lemon juice
1 lemon, zested
 
Glaze:
1 1/2 cups powdered sugar
3 tablespoons lemon juice
1 lemon, zested
Directions:

Cookies:

Preheat the oven to 375 degrees F.  In a medium bowl combine the flour, baking powder, and salt and then set aside.  In a large bowl using an electric mixer, beat the butter and sugar until light and fluffy, about 3 minutes. Add the eggs, 1 at a time, beating until incorporated. Add the ricotta cheese, lemon juice, and lemon zest. Beat to combine. Stir in the dry ingredients.

Line 2 baking sheets with parchment paper (or a silicone mat). Spoon the dough (about 2 tablespoons for each cookie) onto the baking sheets. Bake for 15 minutes, until slightly golden at the edges. Remove from the oven and let the cookies rest on the baking sheet for 20 minutes.

Glaze:

Combine the powdered sugar, lemon juice, and lemon zest in a small bowl and stir until smooth. Spoon about 1/2-teaspoon onto each cookie and use the back of the spoon to gently spread. Let the glaze harden for about 2 hours.  Cookies can be stored in an air-tight container.


Sunday, March 16, 2014

Chocolate Sable Cookies


I made these cookies for Sarah's baby shower last weekend.  And these were truly a labor of love.  Knowing that the week would be busy, I made a test batch the weekend before and I'm so glad that I did!  First off, the recipe calls for grated/shaved chocolate.  I thought I could cheat by chopping up the chocolate and throwing into the food processor.  Also, for the first batch, I followed the Miette recipe but the dough was very dry and hard to roll out without cracking.  The final cookie was a crumbly buttery cookie with melted pockets of chocolate in it instead of the uniform chocolatey goodness that was intended.  So batch two (after doing some research online) involved hand grating and modifying the recipe by adding an egg yolk to help bind the cookie dough together.  Thanks Smitten Kitchen...I should have listened to you the first time around!  I must ask for forgiveness for the quality of these pictures too.  Halfway through batch 2, my dSLR went on the fritz and I had to snap the remaining shots with my iPhone.

Since Sarah's shower was Safari themed (those of you who are friends with me on Facebook already got a sneak peek...we'll be sharing a post soon once we compile the best pictures together from both of our cameras!), I decorated the cookies with a vanilla buttercream frosting and Duff's Cheetah Print and Zebra Stripe cupcake tattoos (similar here).  I had to bake the cookies during the work week (batch 3), transport them to LA, and decorate the cookies the night before the shower so they wouldn't get smushed.  Unfortunately, the shower weekend was pretty hectic, so I didn't get any good pics of the finished product.


Chocolate Sable Cookies
(adapted from Smitten Kitchen)

Ingredients
3.5 ounces 70% cacao chocolate, grated
1/3 cup natural unsweetened cocoa powder
1 cup all-purpose flour
1/4 teaspoon baking soda
1/2 cup unsalted butter
1/2 cup of Confectioners' sugar
1/4 tsp sea salt
1 large egg yolk
1/2 teaspoon vanilla extract

Directions
Sift together the flour, cocoa, and baking soda together into a medium bowl.

Cream butter, sugar, salt, egg yolk, and vanilla until light and fluffy.  Add dry ingredients and grated chocolate together and mix until just combined.  

Heat oven to 350 degrees.  On a floured surface, roll dough gently until 1/4 inch thick.  Cut with cookie cutter, spacing an inch apart on baking sheet.  Bake for 8-10 minutes.  Gently transfer to cooling rack.  Enjoy with a cup of coffee or with ice cream!


Wednesday, February 12, 2014

Berry Filled Celebration Cupcakes


Carolyn and I made these a while back when she was visiting us in LA.  Even though we made these for my friend Becky's birthday, we thought these would be perfect for a Valentine's Day post!  The surprise mixed berry center provides a slightly tart counterpoint to the sweeter buttercream frosting. We topped them off with coconut flakes as they nicely cover any imperfections in the frosting, leaving a perfect looking cupcake.

While out shopping for ingredients for these cupcakes, we found out that silver dragees (i.e. those pretty shiny little silver balls that are used to decorate cakes/cookies) were made illegal in California a few years ago.  We found a great silver crisped rice substitute at a cake supply shop (for those in LA, we went to Gloria's in Culver City). 

While most of our recipes are super straightforward, we first attempted to make these cupcakes with an Italian meringue buttercream frosting (similar to what we used for our Ombre Almond Cupcakes).  We don't know if it was our eggs or the temperature in the kitchen or our thermometer, but our baking luck was certainly lacking that day.  Instead of a light, fluffy buttercream, we were left with a soupy, curdled, lumpy mess on not only one but on TWO attempts.   We then scrapped that recipe, and went with an old tried and true favorite, a classic buttercream, and ended up with a deliciously moist cupcake!  


Vanilla Cupcakes with Mixed Berry Filling and Coconut Flakes
Adapted from here

Vanilla Cupcakes
Ingredients
1 3/4 cups cake flour, not self-rising
1 1/4 cups unbleached all-purpose flour
2 cups sugar
1 tablespoon baking powder
3/4 teaspoon salt
1 cup (2 sticks) unsalted butter, cut into 1-inch cubes
4 large eggs
1 cup whole milk
1 teaspoon pure vanilla extract

Mixed Berry Filling
Ingredients
2 cups frozen mixed berries 
1/4 cup white sugar
1 tablespoon lemon juice
2-3 tablespoons of cornstarch

Basic Vanilla Buttercream
Ingredients
1 cup (2 sticks) unsalted butter, room temperature 
6 cups confectioners' sugar 
1/2 cup milk 
1 teaspoon pure vanilla extract

Decoration
2-3 cups coconut flakes
Sprinkles or dragees

Directions
Preheat oven to 325 degrees. Line cupcake pans with paper liners; set aside. In the bowl of an electric mixer fitted with the paddle attachment, combine flours, sugar, baking powder, and salt; mix on low speed until combined. Add butter, mixing until just coated with flour. 

In a large glass measuring cup, whisk together eggs, milk, and vanilla. With mixer on medium speed, add wet ingredients in 3 parts, scraping down sides of bowl before each addition; beat until ingredients are incorporated but do not overbeat. 

Divide batter evenly among liners, filling about 2/3 full. Bake, rotating pan halfway through, until a cake tester inserted in the center comes out clean, 17 to 20 minutes. 

Transfer to a wire rack to cool completely. Repeat process with remaining batter. 

For the berry filling, combine the frozen berries, sugar, lemon juice, and 2 tablespoons of cornstarch in a small saucepan.  Place over medium heat until boiling, stirring occasionally.  Add additional cornstarch if necessary for thicker filling.   Set aside to cool.

For the vanilla buttercream, place the butter, confectioner's sugar, milk, and vanilla in an electric mixer with the paddle attachment.  Mix until light and fluffy.
  Once cupcakes and berry filling have cooled, use a small knife to cut a hole in each cupcake in the shape of an upside down cone.  Set aside the cupcake piece that was cut out.  Place a dollop of berry filling in the hole.  Cut the tip off the cupcake piece, and place back on the cupcake to cover the filling.   Use an offset spatula to frost tops of each cupcake. Cover with coconut flakes.  Decorate with sprinkles or dragees if desired. 


Blogging tips